As promised, I’ll use this opportunity to give greater detail to the work progressing in the front half of the house: wiring, insulation, structural changes, and drywall.
Given the fact that we have since decided to remove much of the plaster and lathe in the house, the time we spent peeling wallpaper seems a bit wasted.. But, hindsight is 20-20. The original intent was to hang sheetrock over the wooden slats in the ceiling that the acoustical tiles had hung from. I went around with a screw gun and a ladder reinforcing the slats so they actually stay put once the drywall was fastened in place – after all, none of this is really any good if it falls in your mashed potatoes during dinner. Again, much of this has been for nothing because almost EVERYTHING came out anyway!
We started the gut job in the ‘front porch’ area of the house. When the house was built it was an open porch, a short time later it was screened in, and eventually enclosed with windows all around. The sellers referred to it – at that point – as the solarium.
They would sit there and drink tea with their grandparents and watch the activity on the street below. From that point, there have been windows taken out and changes to the roofline.
While I do plan to rebuild the latticework around the front door, I think it’s going to be too expensive to bring back the old windows and upper railing right now. Someday, though!
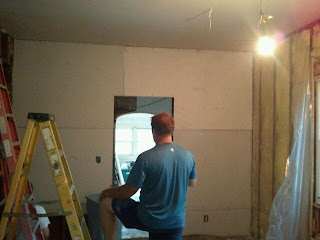
Anyway, in the entryway, we found the insulation and electrical work to be pretty spotty – both were replaced. I’m no electrician, but when your stereo turns on and off mysteriously, that’s an issue! Also, the large opening between the entry and the living room was sagging a bit, so we knew something would have to be done. What we didn’t know before the plaster came down was that it was severely under structured given the span it crossed and that it bore much of the weight of the gable above it.
 |
| With new headers and jack studs in place, we were squared up and ready for action! |
The dining room was fairly straightforward. We’re adding three-way switches on either end so I can control the lights easier. Previously, there weren’t light switches in the front half of the house – only pull chains.
 |
| Partial chimney in the dining room. |
 |
| Dining room facing the Kitchen/New Garage. |
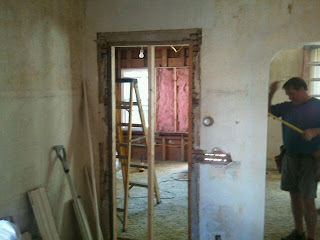
Dad and I removed the old partial chimney from the west wall of the dining room. This was originally the kitchen, and this chimney would have served the cooking aparatus at the time. I toyed with the idea of saving it, exposing and sealing the bricks, and building some cool bracket to support it. Once the plaster came down, we found large holes in two sides and failing mortar throughout. All for the best, though – this visually opens the space and leaves lots of room for hanging things on the wall.
There was a door between the dining room and the entryway – I assume – from the days when the entry was a porch and before the large opening existed between the entry and the living room. With the other openings present, it didn’t make sense from a traffic or visual standpoint to have this opening in place anymore. Studs + drywall = no more door!
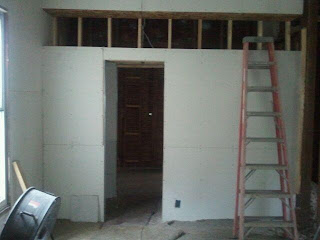
The second bedroom/office room proved to be the biggest mental challenge of all the rooms thus far. Because we wanted to maintain the circular flow through the house, it was important that we find a way to accommodate that while also including storage options for the bedroom/office and adjacent bathroom while also providing privacy for those who might use it as a true bedroom someday.
Our solution – after much debating, head-scratching, and hand gesturing – was essentially to leave the space as is. We did make a few tweaks: we removed the cluster of tiny doors in the closet area and added another pocket door to the bedroom side of the bedroom/bathroom pass-through. We are also batting around the idea of hanging a larger barn-type door over the archway leading from the bedroom to the living room. This way, there will be privacy when needed and a wicked cool architectural feature when not in use.
 |
| My dad, the saint. |
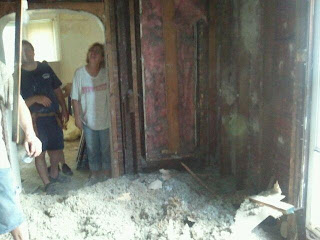 |
| The reason we'll all probably have Mesothelioma. |
 |
| Notice the partial chimney - as seen from the second bedroom/office. Also notice the Perfect 10 dismount off the ladder. |
 |
| As seen from INSIDE the bookshelf :) |
 |
| Bedroom/Bathroom pass-through with bookshelf above. |
Perhaps the coolest part – and by far the piece I’m most excited about – is the built-in bookcase over the closet. We’ve framed this in to accommodate books up to 15” tall, so it will be a nice space for stacks of books, artwork, and other fun stuff.
The COOLEST part of the coolest part: a library ladder that I'll have to track down and install later. (My friend Melanie asks excitedly, “Like in ‘Beauty and the Beast!?” Not *exactly* my inspiration, but yes! J )
The living room is another room that will be left fairly untouched. Because of my concerns about keeping the bay window area and fireplace surround intact, we’ll be leaving the plaster in place. The west wall of the living room, however, is a fix that needs fixing. At one point there was another window on this wall and – like many places throughout the house – when they were done with the window it was covered up. In this case with wallboard of some kind. So, we’ll take that board down while we're at it.
The only other major update in the living room has been the wiring. Like everywhere else in the house, the wiring was a mix of new and old: knob and tube meets something else, spliced in with something else, blah blah blah. We’ve removed all of that and replaced it with modern, grounded wiring including wiring for a speaker system to be mounted around the room and TV above the fireplace. Nevermind that I don't OWN a TV that will fit on the fireplace..
With all of these changes taking place, it’s getting easier and easier to see the light at the end of the tunnel. While we’re still QUITE a way from completion, the new shape of the house is coming through and I feel great about knowing we’re leaving a positive, lasting impression on something that has meant so much to so many people.
That’s all for now – thanks again for stopping by!


