Friday, October 21, 2011

Show me the money!

There are several opportunities out there for saving money when renovating a house. For instance, we have taken serious advantage of store and manufacturer rebates.
Lots of places offer rebates..It’s usually $4 off your purchase of this or that, and most often I’ll ignore it because it takes weeks and weeks to get your $4 back, and lots of times it can be a fair amount of effort. We decided really early on that with as much as I’d be buying for this project, it would be well worth the time and effort to send in for rebate money.
For instance, if you remove the UPC codes from bundles of insulation and send them in with receipts to the utility company, you get a debit card loaded with money.
..not that I ever bought any insulation..
I used that to buy exterior doors… which qualify for an Energy Star tax credit. We also watched store advertisements and ended up buying durable, 25-year shingles A) at an 11% discount, and B) with an option for an in-store rebate. I then used that rebate money to purchase fiber-cement siding which – you guessed it – qualified for a $1 per board rebate. $1 per piece x 325 pieces means money for exterior paint. So, as you can see, I’m still shelling out good chunks of change for these things, but one purchase (and a little planning) helps to subsidize the next purchase, and on and on.
Many of the rebates described were in-store options. But, as I said, there are also manufacturer rebates from time to time, so pay attention to those.
There are also various services through local utilities – things like energy audits where they can show you where you gain/lose the most heat energy from your house. These services are provided free of charge to customers and, in my experience, they leave you with a ton of energy saver light bulbs and a new programmable thermostat. Bonus! The electric company has a program where you can turn in your old appliances for cash, assuming they still work. There was an old refrigerator in the basement. Boom - $50.
Another thing we’ve paid a lot of attention to is waste. Many professional jobsites will hang a 12’ sheet of drywall, cut out the openings, and throw the scrap away in favor of speeding through the project to get to the next one. While our methods are quite a little bit slower, our waste is quite a bit less as well. We use smaller pieces on smaller walls. It just makes sense.
We also took advantage of the scrap yard located in a neighboring town. When we removed the too-narrow water lines from the house early on, we took that copper to the scrap yard and paid for all the new plumbing with the proceeds. Because there was also a good deal of copper in the old wiring, we could cash that in to offset the costs of the new wiring. (Note: We took the time to save the old steel siding, sort it, load it in the truck, and drive over to the scrap yard only to find that they weigh it at aluminum rates…we used those proceeds to buy a sandwich.)
Look at all those rebates..
A really cool project I haven’t mentioned is my dining room table: we salvaged wood from the attic space of the old garage, planed it down, and made it into the most amazing table. We copied the design from Restoration Hardware..So, if anyone ever wants to buy it, I feel really confident knowing I could get $4,300 out of it ;)
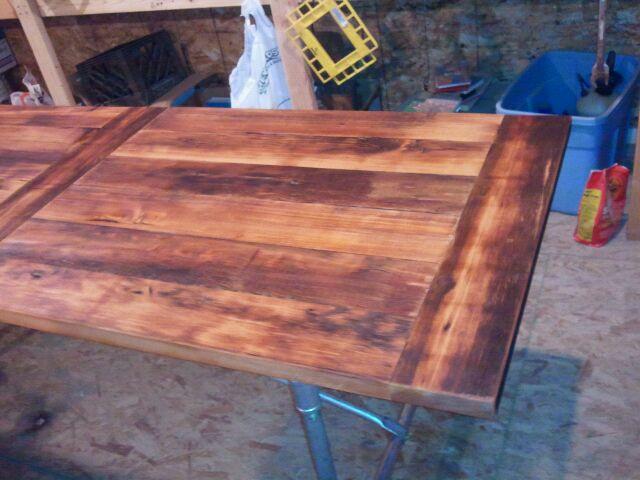
I finished it with Tung Oil for protection thinking it would dry lighter colored.
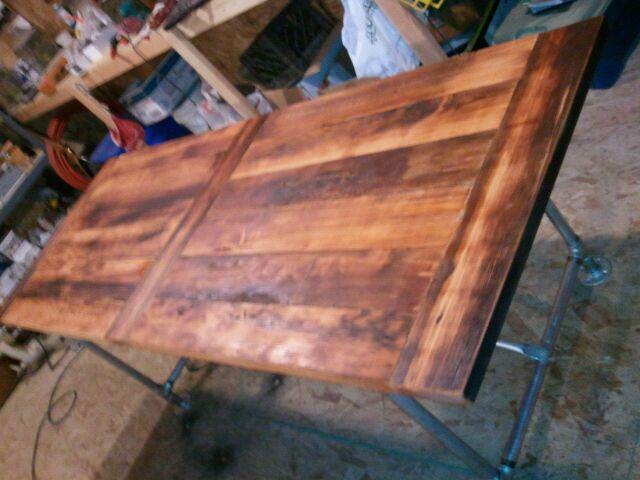
It stayed fairly dark like this, but we've used steel wool to dull it slightly. With use, the color will fade over time as well.
Learned how to weld in the process! :)
Also, my family has always been into flea markets and antiquing and things like that. I take every opportunity I can to go and usually find good ideas for the house, if nothing else. One of the last markets I went to, I found a clawfoot tub that was in pretty good condition. I knew early in the project that I would like to have one, and had been doing research online. The going rate for the rusty old tub in grandma's barn was apparently $200, which I wasn't enthused about. But, I had planned to go look at some nonetheless. Then, at the flea market, I found a vendor who had a pair of tubs he wanted to sell. He said he'd been carting them around for a while and didn't have a lot of interest..and sadly, he was going to scrap them after that very event so he wouldn't have to load and unload them anymore. He said he could get $50 out of the scrap metal, so he would sell it to me for that - SOLD!

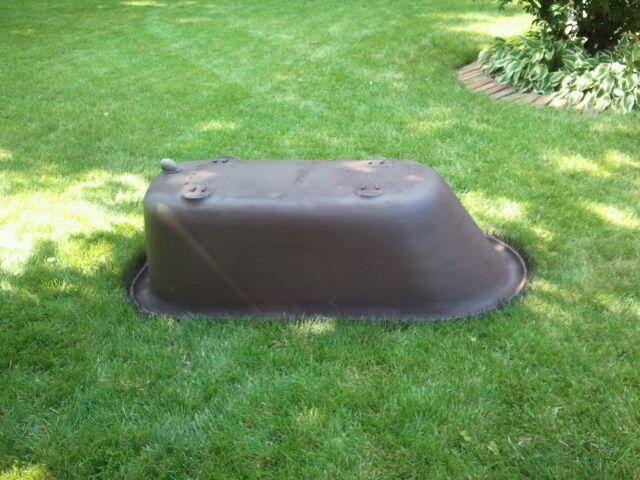
Here's the tub..all sanded and painted, waiting for it's feet. And a faucet. And water.
I’ve also been to and from the Habitat for Humanity ReStore in Des Moines a time or two. The ReStore is an awesome place, it’s open to everyone, and it’s inherently ‘green’ which is something I’m into. What it does is this: people who are doing home improvement projects (including contractors) who have leftover items can take them to the ReStore where they can be sold to someone else who needs that random piece of slate tile for their front entry, or that old front door to match the others in their old house. To my knowledge, donations are tax deductible (I took the old bathroom vanity, ceiling fans, closet doors, and a few other fixtures) and anything you’d like to buy is fairly priced. The proceeds fund the store which provides jobs to at-risk youth and others in the area. Very cool program – and they’re expanding their operations, so check them out!

There's still plenty of life in the old closet doors, vanity, and light fixtures!
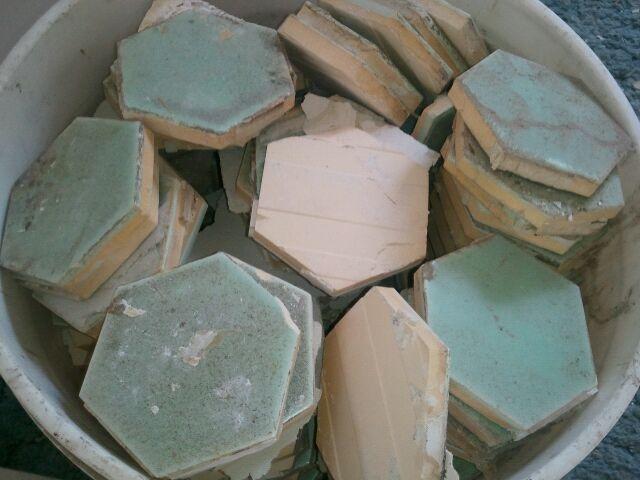
Part of me wants to keep the old tiles from the bathroom. The other part knows someone else will use them better than I could, and it will help them in their renovation.
There is also the completely unending generosity that comes with living in a small town and having great friends and family. I have been so fortunate to have people come out and help me put this house back together, give me their old barbeques, or donate beer and pizza in their absence. All of it is much appreciated, and yet another benefit of living life right here in Iowa J

Wednesday, October 12, 2011

Windows: In Depth

When installing new or replacement windows, there are a number of factors to consider. For instance, when I bought my new windows, I wanted a model with an insulating quality – many window manufacturers include this as standard now. What this feature includes is essentially two panes of glass with a layer of gas between the two panes – this helps to ward off the extreme heat and cold we experience in Iowa. Some brands will even have a glaze-like property that filters out unwanted (UV) rays that can fade carpets or upholstery over time.
From what we could see, the older windows were replacement windows, anyway. The windows themselves were attached to the trim pieces around the edges, and the trim pieces were nailed to the house which is fairly common practice for this type of installation. Once we removed the trim from the exterior walls of the house, the windows came out fairly easily. We could then reframe as necessary.
In the dining room, the older windows weren’t very solid to begin with – this was because the ORIGINAL, original windows were so much bigger (about 80”!) and the newer framing would have been difficult to put in place given other constraints. Because we had no siding outside and no drywall inside, there were no obstacles to work around!
The kitchen window framing wasn’t in great shape – due to the flat roof over the kitchen, this area of the house had patches of rot here and there that we replaced as they were found.
The Kitchen windows, again.
The other windows we replaced were in the bedrooms. The new window in the master bedroom was taller and thinner than the window before it, so we ended up cutting out several studs and reframing quite a bit of the area around the window. This worked well because Aimee and I were rooting for more symmetry with the bedroom window anyway J Now it’s closer to the middle of the wall, and we installed a header to carry the weight of the roof above.
The Master Bedroom window, pre header installation.
As with doors or openings of any kind, it’s important to have the proper structure (ie. a header) installed above to carry the weight of the roof assuming the weight of the roof actually falls on the opening. In my house, one easy way to tell is to look at the roof…duh! On the gable ends, there isn’t really much downward pressure from the weight of the roof – the weight falls on the walls to either side of the gable.
A poorly drawn illustration showing the downward pressure on the walls supporting the "ends" of the roof. Think of laying an open book down on a table..it falls flat. Same with this..there really isn't downward pressure on the gable end of a structure - it's carried by the adjacent walls!
There are other factors to consider when removing and adding structure, but that will get you started!

When actually installing the windows, it's important to have the "hole" properly prepped. There is some debate about whether you should flash the sill before installing the window: one school of thought says yes; another says if the outside of the window is flashed properly, what you do to the sill shouldn't matter. We went with the latter. 

Windows will come stamped with measurements for the openings they will fit into. Assuming you've framed your raw opening to match these measurements, the next thing is to make sure the window unit rests 1/4" above the sill...in the event the flashing we discussed doesn't, in fact, work out, this will help to prevent moisture from hanging around in that opening. Once the unit it centered side-to-side in the opening and leveled up, you're ready to nail the strips to the wall.

Once this is done, take a weather/moisture barrier tape and run a strip across the bottom of the window, over the nail strip. Repeat on the sides, and then the top. This creates a watershed...if water gets behind the siding, it will roll over the tape on the top, down the sides, and over the bottom without getting into the structure of the window and causing rot.
 
Now, I’m off to hang more drywall…I got a ceiling last night!! J

Tuesday, October 11, 2011

Windows: IN!

Thought I’d take a moment to show you my new windows!
Once we’re a little closer to finishing, I’d like to see about adding muntins/divided lights to the upper panes so the windows will look more like the originals. That could be a ways down the road, though.
Anyway, we’ve installed the six windows in the back of the house – this is the area that will get sided this year. The remaining windows will be replaced next year (or the year after) when I get to siding the rest of the house. Since finishing the windows, we’ve started – and nearly finished – insulating the back of the house. Once that’s finished, it’s time for us to hang more drywall and for my mudder/taper man to come and work his magic.
Kitchen windows - right over my imaginary sink.
Speaking of siding, I got a phone call this morning (before I even got out of bed, thank you) saying that they’ll be delivering it tomorrow which is a few days earlier than anticipated. No problem: I’ll just have to make a run to the store to hunt down the window/door trim I want and pick up the corner pieces that work with fiber cement siding.
Big hole for a big bedroom window!
Big things happenin’!

Wednesday, October 5, 2011

Driveway, driveway, gettin' down on driveway

Silky smooth..
As you can see, my cement guy wasted no time in getting everything poured and smoothed out!
Per our conversations, he poured the cement so water would slope away from the garage door and stoop area. With the old concrete, some settling had taken place over the years and I noticed that water would pool up at the foot of the step on the days we had lots of rain. No more! Not only that, but – like I said in the previous post – we don’t have to walk around the mounds of gravel anymore. I’m so excited about this, it’s ridiculous.
Another new development: I’m installing windows?
When my siding guy came to check everything out, we talked about the best way to do everything. In that conversation he pointed out that the finished product would look better if the sheathing were smooth, or at least more consistent across the span of the wall from one addition to the next. While we had planned on that, he also pointed out that, I needed “new F$%#ing windows.”
He’s a pretty eloquent guy, but he’s also great at what he does J
I told him flat out that even though I would like to have new windows, it’s absolutely not in the budget and I will not do it right now. The windows I have are fine, my utility bills aren’t outrageous by any measure, and I can’t justify the costs for something that truly isn’t that wrong. Even as I said it, I knew getting the new windows now would be the right thing to do…it’s cheaper to get them now while we can easily change the size (considering I have a couple that are non-standard sizes)..it’s easier while the walls are open and the mess already exists..blah, blah, blah.   No, Siding Man, I will not buy new windows.

Enter, my Roommates.
Dad: “What if Mom and I bought you some new windows as a housewarming present?”
Me: “Pleasure doing business with you.”
Lesson for the day: Don’t ever walk away from a deal like that. Ever. J  

So, last night we set about taking the windows in the kitchen and the dining room out. This proved to take longer than anticipated because we didn’t have one of the tools we needed to work as quickly as we wanted. That said, we removed all four windows and built the new framing for the new kitchen windows.
It’s going to rock pretty hardcore.
Leaving my mark :)

Tuesday, October 4, 2011

And, I'm back in the game!

Yesterday was a good day! And before noon, which never happens! J
Early in the day, I left work for a bit to meet with the City building inspector. He had to OK the new wiring in the back of the house, and it turns out we passed! Now, we can contact the power company to have them remove the temporary post on the back of the garage, hook up the permanent meter socket, and shine some lights on the house. Now that I’ll be able to stay past 7:00 when the sun starts going down I have no excuse not to be productive!
I can’t tell you, effectively, how big a step this was. Waiting for our original electrical contractor held us up for weeks. Finding another one after the original flaked took a few days, and getting everything ready for the inspection took time as well. Now that we’re over this hump, we can insulate the back half of the house (which we started last night), hang drywall, start ripping up carpet, and more! This is also really exciting because we know everything should go really fast from here. I know, you’re thinking, “Yeah, you’ve said that before,” but I’m serious now! From here forward, we won’t need to wait on contractors, inspections, or anyone but ourselves. The main objective will be making sure everything is at the house and ready when it’s needed.
In other news, I’m getting a driveway today! We had to break up a piece of the original to pour the footings and slab for the new garage. Once that was completed and we were certain we weren’t going to bury anything under the driveway, I called my cement guy and gave him the green light. Really excited to see what this looks like – we’ve been walking around gravel so long, it will be so amazing to have a nice, new, FLAT surface to walk on.

Oooh..excited! J